ZWO ASIAIR PRO WiFi Controller – Field Notes and First Impressions

1. Overview
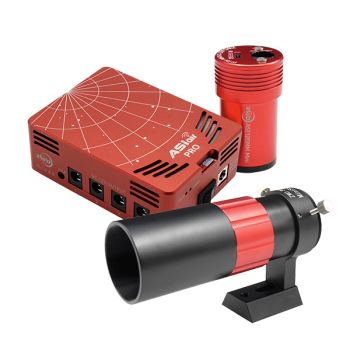
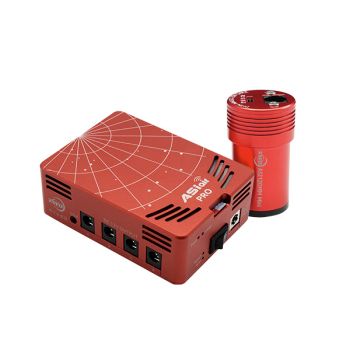
As most astrophotographers know, setting up a computer with all the necessary software to capture a good image- and getting it connected to your hardware- is one of the least fun aspects of the pastime. So when ZWO released their first ASIAIR device, many imagers were excited to use this little WiFi controller to run their imaging sessions using only a smartphone or tablet. ZWO apparently had a lot of feedback on this device, and they've used it to develop a much more powerful device, the ASIAIR PRO (Figure 1). This controller truly seems to be an all-in-one device that includes software for mount control, electronic focusing, guiding, plate solving, and image processing. When AgenaAstroProducts suggested I try out one of the first available ASIAIR PRO modules, I jumped at the chance to see what this little module could do.
2. Setting up the ASIAIR PRO
To see what the ASIAIR PRO was capable of, I put the device through its paces at my backyard 'Dark Side Observatory' in rural Pennsylvania in late January through March 2020. For the purpose of this review, I used the following equipment in my observatory:
- ASIAIR PRO v1.4
- ASIAIR PRO Firmware v4.55
- Celestron CGEM-DX equatorial mount pier mounted
- Sky Watcher Esprit 120ED and Meade 12" LX90
- Williams Optics Redcat 51
- ZWO ASI071MC-Pro (imaging camera)
- Canon 6D DSLR (used for this review)
- ZWO ASI290MC (guide camera)
- Orion 60mm Guide Scope
- Pegasus Astro FocusCube
- Anker Model A7515 7-Port USB 3.0 Data Hub
- iPad 2
- iPhone X
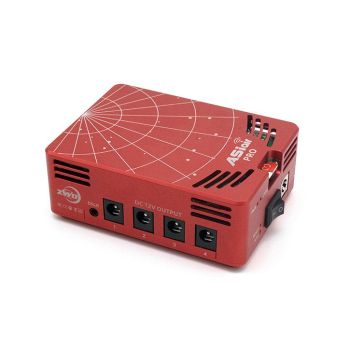
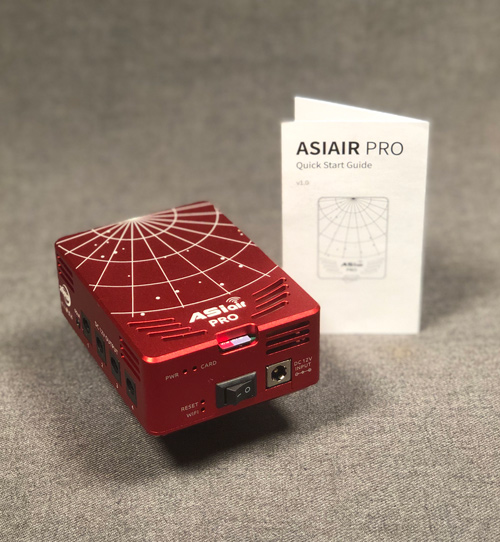
The ASIAIR PRO has a different look and feel compared to the smaller first-generation ASIAIR. Housed in a red anodized metal enclosure, out of the box the ZWO ASIAIR PRO looks like a well-crafted astrophotography accessory that looks well matched with my ZWO cameras and even my Williams Optics Redcat 51 telescope (Figure 2). The ASIAIR PRO supports several mounting options including ¼-20 mounting holes and a finder-type dovetail. I simply used the included dovetail to attach the device to the slot for my finderscope on my Esprit 120ED (Figure 2).

The ASIAIR PRO needs at least a [email protected] power source for basic operation, and if you plan on using the built in 12VDC output ports for other equipment like dew heaters, then you need a [email protected] power source. These aren't hard to find: for example, this power supply at AgenaAstroProducts does the job nicely.
3. Getting Connected to the ASIAIR PRO
The next step was the installation of the ASIAIR app on an old iPad 2 tablet and on my iPhone X. The app is available at the Apple App Store or at Google Play for Android devices. The app worked great with both devices on the initial install. However, I soon learned my aged iPad 2 tablet is past its prime when dealing with large images which causes it to operate at a snail's pace. Although it has a smaller screen, the much newer and speedier iPhone X operated smoothly and offered a quick response time in controlling the ASIAIR and capturing images.
The built-in WiFi capabilities of the ASIAIR PRO made connecting to the device easy and straightforward on both iPad and iPhone. The device shows up instantly on the accessible WiFi device list. When setting up in a field environment, you should not encounter any issues with the WiFi range, but the distance from my observatory to my living room couch were beyond the range of the ASIAIR PROWiFi signal. Luckily the ASIAIR PRO is equipped with an ethernet port. I have an ethernet connection in my observatory that runs back to the house, so I can access the ASIAIR PRO wirelessly from any location within my home WiFi range. The ASIAIR PRO becomes just another appliance on the network and is assigned an IP address. I access it via the ASIAIR app by selecting "Connect via IP" rather than WiFi.
4. Connecting to the Camera and Mount
I run all my equipment through an existing Anker USB 3.0 powered hub, so for this test I simply plugged the output USB cable to one of the two USB 3.0 ports on the ASIAIR PRO. Tapping the main camera setup button in the application (the icon that looks like a DSLR camera) and I was presented with a drop down list of the cameras currently recognized on my rig (see Figure 3). To my surprise, this also included my Canon 6D DSLR. The setup of the ASI290MC guide camera was similar: I just tapped on the guide camera icon and was once again presented with a similar drop down list as the main imaging camera.
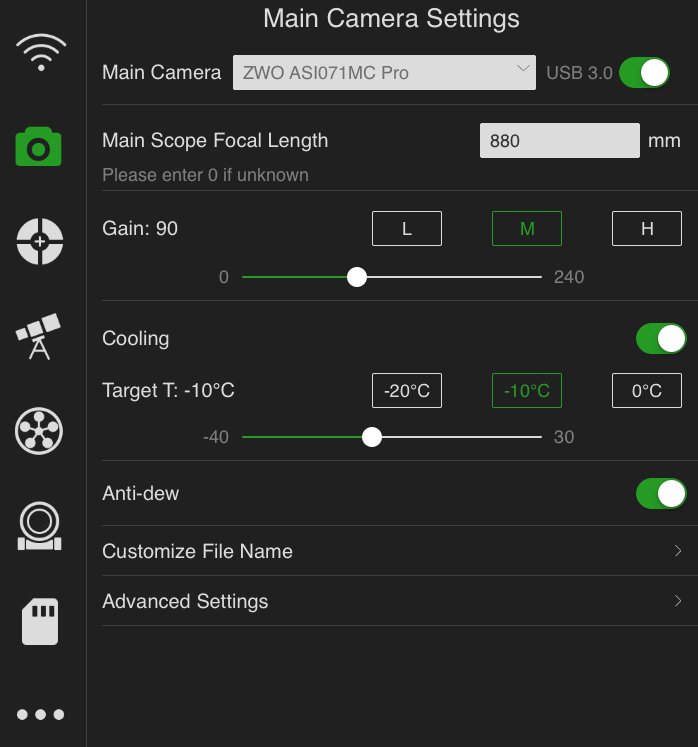
After selecting the cameras, I was offered other camera options such as cooling, anti-dew, gain, and all the other standard camera setup parameters you would expect. Each camera connection screen also asks for your telescope focal length. Why? Because the ASIAIR PRO also does plate solving and auto centering of your selected targets in the main camera, as well as for calculating the guiding pulses with the guide camera. Sweet!
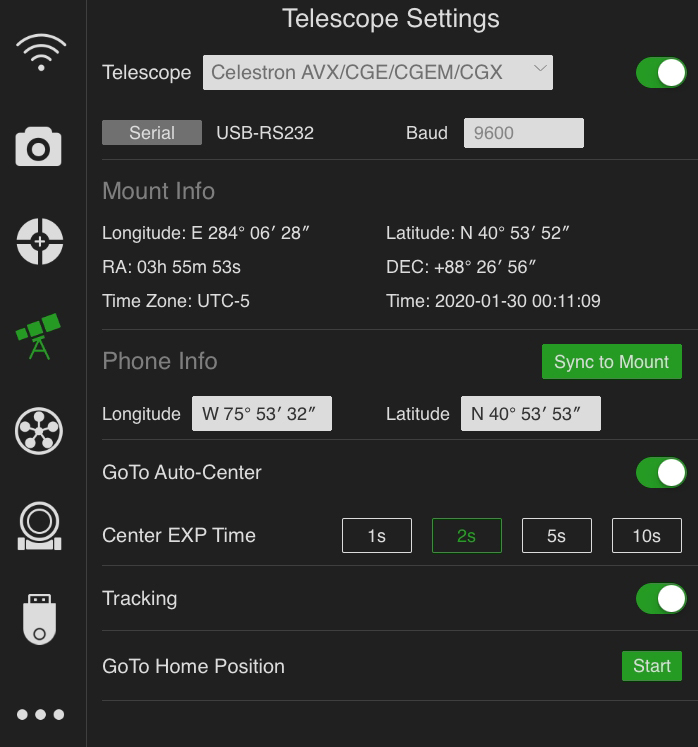
Next came connecting the ASIAIR PRO to my Celestron CGEM-DX mount by tapping on the telescope icon. The ASIAIR PRO does not connect to the mount wirelessly, so I had to plug a USB cable directly from the CGEM hand controller to one of the two USB 3.0 ports on the ASIAIR PRO. It worked like a charm and I was able to slew the scope, park it in the home position, and much more (see Figure 4).
I also attempted to connect my Pegasus Astro FocusCube to the ASIAIR PRO, but despite numerous efforts I was not able to get a connection to this device either through the Anker USB hub or via a direct connection to either the ASIAIR PRO USB 2.0 or 3.0 ports. Hopefully additional support for these devices will come at a later date.
5. Selecting a Target for Imaging
On to imaging!
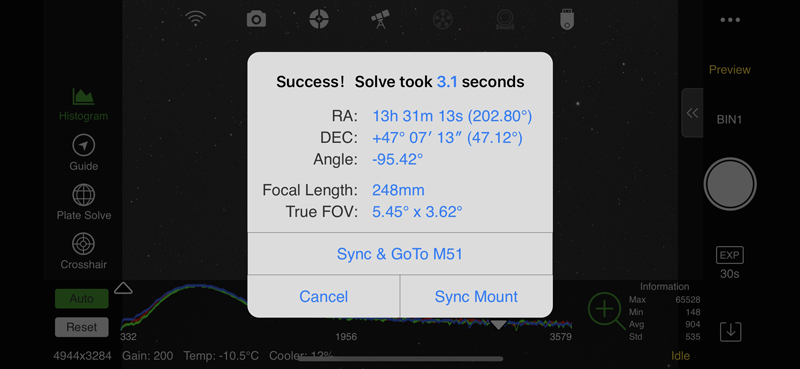
The ASIAIR app has a small slide-out window on the right side of the screen showing the RA/DEC of the mount, and gives you the ability to move the scope using the standard North, South, East and West arrow buttons. The top of the dialog box contains a small input box with a question mark and a GoTo button. Tapping in the box brings up a listing of deep-sky objects that are currently available to image at your location and includes a graph showing if they are at peak elevation or not (Figure 5). For example, for a first try, I typed in M51 (the Whirlpool galaxy) and instantly details appeared for this object. I then tap GoTo and the scope slews to M51, takes a quick picture AND centers M51 in the field of view, all in a matter of seconds. I've never had this happen before on the very first go in any other software application.
In an updated version of the ASIAIR app and firmware (ASIAIR PRO app v1.42, ASIAIR PRO Firmware v5.05), it's possible to enter a "custom object" instead of picking objects from the large list of included objects. It's also possible to enter celestial coordinates of an object, for example, a comet, and slew to the object before imaging. Tracking rate selection was also added in this update including sidereal, lunar and solar. This version of the firmware also adds the ability to do remote image management on the ASIAIR PRO including browsing files and folders and the ability to save files locally on your device for doing other quick edits.


6. Capturing Images and Live Stacking
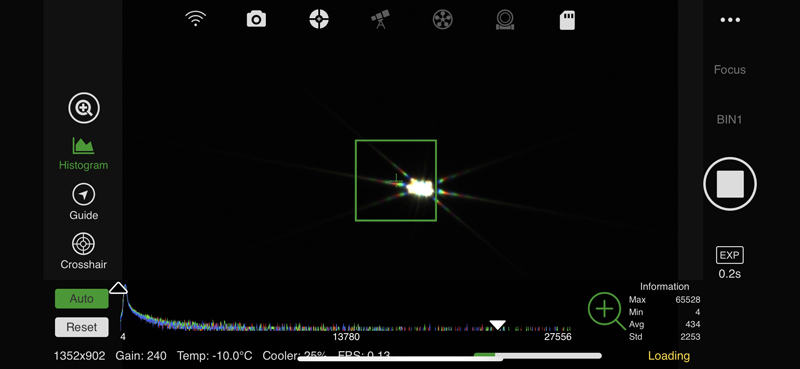
For this test, I used both my Canon 6D and my ZWO ASI071MC-Pro cameras. I was pleased to discover the ASIAIR PRO completely controls my Canon 6D including preview, live stacking, focus using the camera's Live View (although I still focused at the camera), 5x zoom, and more. The list of cameras includes many other DSLRs from Canon and Nikon. Figure 8 shows the focusing screen of the app while focusing with a Bahtinov mask and the main camera. The images can be saved on the ASIAIR PRO as well as the SD card in the camera. You can setup a "shooting schedule" setting varying exposure runs, delays between image runs, and even shutdown the ASIAIR PRO and set your rig to the HOME position at the end. I've heard some talk about adding multiple targets in a future software edition, similar to what Sequence Generator Pro performs, but that was not available yet.
Swapping out the Esprit 120ED for the Meade 12" LX90, I waited for a clear night to try capturing the Orion Nebula (M42) in the presence of a full Moon. After selecting M42 in the ASIAIR App, the telescope slewed and centered the nebula.
When setting up, there's the option for the main camera to Focus, Polar Align, Preview, Autorun, and Live Stack. Although I didn't try the Polar Alignment tool as I'm permanently pier mounted, all options worked great during the test. The live stacking was particularly impressive.
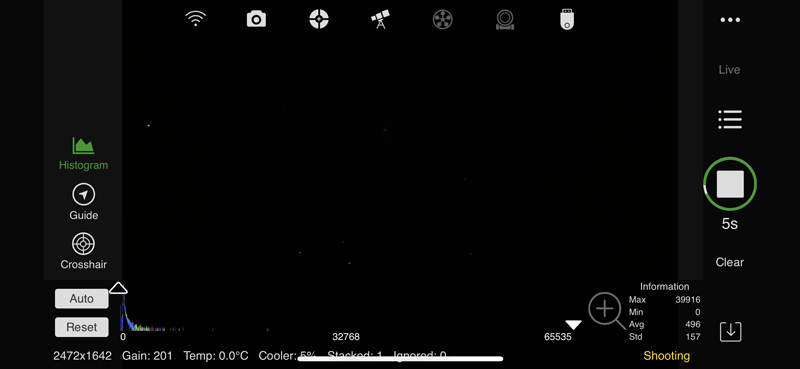
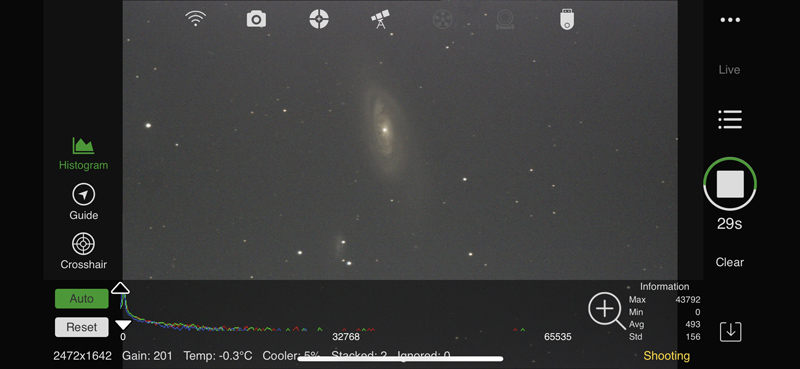
After selecting Live Stack, there are further menu options such as setting the exposure, type of image (flat, light, dark, bias), and an option to save all the individually collected images. Images are all saved in FITS format, including the final Live Stack image, so the end user should be prepared to work with FITS files. Histogram functions can be selected and deselected by tapping on the histogram button on the left side of the screen during the live stacking. I could also manually apply the stretching by adjusting the sliders on the histogram, or simply click on the Auto button to automatically apply a stretch to the stacked view. I had a few subs get ignored, perhaps because I was imaging in a full moon.
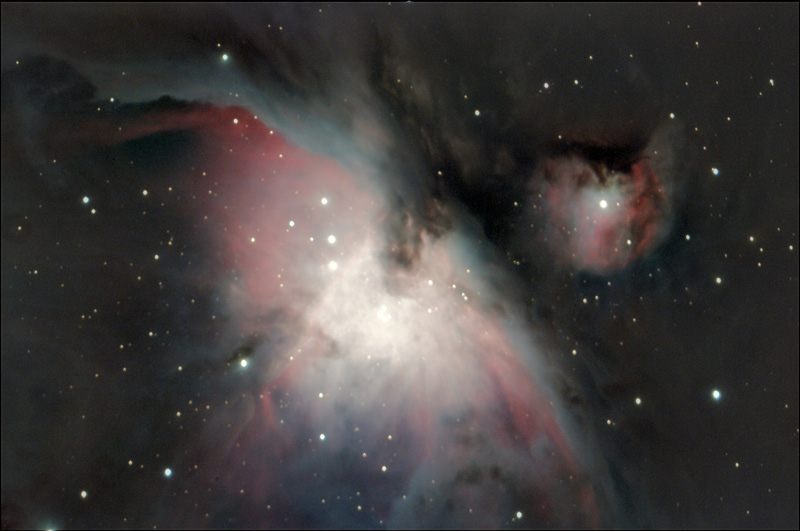
Figure 9 shows the results in the ASIAIR app of an autorun sequence of 10 images on the Orion Nebula, auto stretched. Figure 10 shows the processed FITS file from a live stack of M42, 30 x 30 seconds, no darks/flats/bias, processed with PixInsight and Photoshop.

Images take memory of course, and out of the box the ASIAIR PRO has 84GB of storage, enough to start your first adventures. This is split between a 20GB available on the micro SD card and another 64GB on the included memory stick. You can upgrade the memory stick up to a recommended maximum of 512GB.
The live-stacked image from the ASIAIR PRO also looks good enough for quick views that are interesting to fans of electronically-assisted astronomy (EAA). The live stacking inside the ASIAIR PRO is simply using a light stretch histogram. Unlike Sharpcap, the most commonly used software package for EAA, it's not possible to adjust star detection threshold or change the stacking algorithm. This could result in some lost frames while using the live stack feature; the frames are saved, but they may get skipped in the stacked image as part of the current star detection algorithm. It will be interesting to see how further firmware upgrades will improve the capabilities of the ASIAIR PRO.
Figure 11 and 12 show live-stacked views of 14x30 second exposures of the core of the Orion Nebula. In Figure 10, the bright nebulosity is visible; in Figure 11, the histogram was manually adjusted to darken the nebulosity and show the stars of the Trapezium. Figure 12 shows the same number of stack with the histogram manually lowered to show the stars of the Trapezium. This type of functionality is promising for those interested in electronically-assisted astronomy (EAA).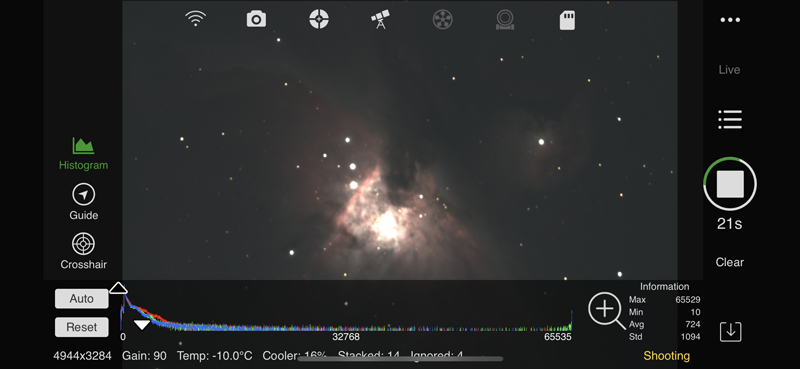
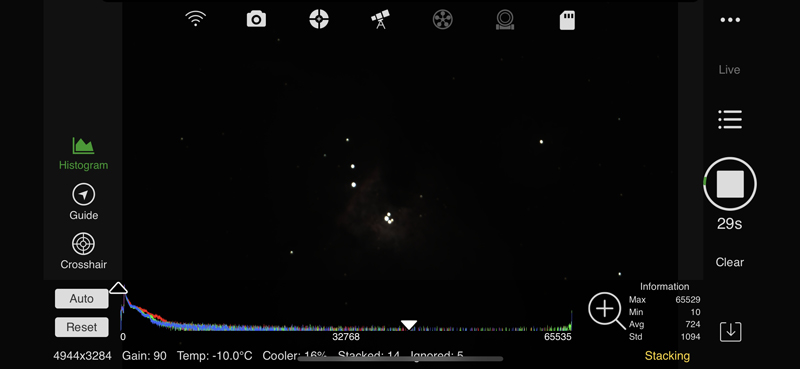
Figure 13 shows more examples of images, in this case 3x60s guided images of the galaxy Messier 90 captured using the ASIAIR PRO and a ZWO ASI071MC-Pro camera and the Meade 12" LX90 scope. Figure 13(a) is unstretchedwhile Figure 13(b) is auto stretched and Figure 13(c) has the histogram stretched manually.
It's also possible to apply calibration frames in both Autorun and Live Stack mode. In Autorun the subframes are saved as individual FITS files, while in Live Stack they are saved as a stacked FITS files. So the Live Stack dark, flat, bias frames would be more like a master frame. When setting up a Live Stack session there is a dialogue box for selecting a master dark, flat and bias that can be used and applied during the run. The only issue is that these are applied to the stack and saved with the stack, there no way to make adjustments in post processing like you can by saving individual subs. So if you have a dark or bias library, you can load them on the USB drive and apply them inside the app.

7. Running ASIAIR on a PC
Of course the whole point of the ASIAIR is to eliminate the need for a computer while imaging. But sometimes my old eyes have a hard time seeing all the details on my iPhone X. So I installed an Android emulator on my desktop called BlueStacks (v4.170.10.1001) in an effort to see if ASIAIR app v1.4.1 (4.66) will run on a desktop or laptop PC. ASIAIR ran flawlessly on my desktop using the emulator software. You will need a Google Play account to view and download the apps, or you can download the APK file from the ZWO site at this link and look under the 'Android' tab. Bluestacks itself ran a little clunky on my desktop, but the ASIAIR App, running inside the BlueStacks shell, ran great.
8. Final Thoughts
The ZWO ASIAIR PRO can really make life easier at the telescope and replace an expensive and cumbersome laptop setup. With the added benefits of the power and USB ports, it will also help in reducing telescope clutter and cable management, and face it, most of us can use a course in cable management! I can only see the ASIAIR PRO app growing and adding additional routines and functionality as it continues to be developed. This amateur astronomer gives the product two thumbs up.